This article discusses functionality that is included in the Enterprise+ plan. Please contact us if you would like a live demo or would like to try using it in your account.
This article refers to features. Depending on your workspace type, you may see “activities" in your workspace.
Aha! Roadmaps | Advanced custom layouts (Enterprise+)
There is an art to custom record layout design. Simple layouts with few fields often mean you miss out on key information. Complex layouts with many fields often make it harder for your team to find the information they need. And though you can mark fields as read-only to make sure information stays consistent on each record, you often want your team to be able to update read-only fields at some point.
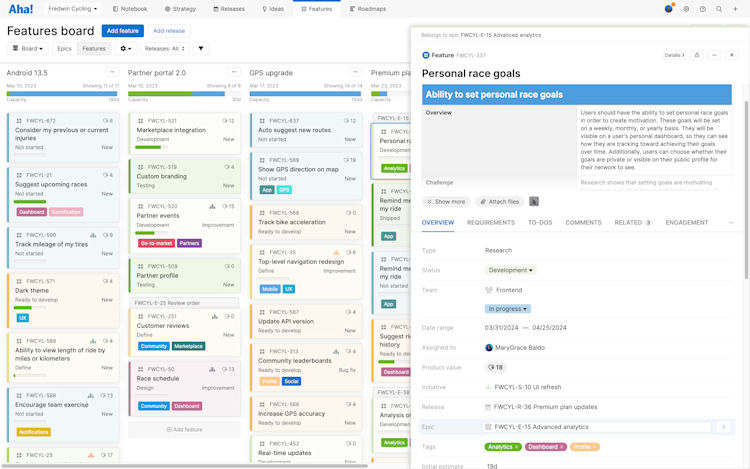
It can be especially difficult to craft a custom layout that finds a balance between streamlined and comprehensive across every stage of a record's workflow. Advanced custom layouts, available to Enterprise+ customers, bring you that balance. Instead of setting one record layout per workflow, you can change a record's layout based on its workflow status. While you are defining a new initiative, for example, you need to capture certain details such as budget. But once approved, the budget field should not change — and you likely want to start capturing additional details related to the initiative's progress and development.
You need to be an administrator with customizations permissions to configure advanced custom layouts — though workspace owners can select the custom workflow and layout that each record type will adopt in their workspaces.
Click any of the following links to skip ahead:
Layouts and workflows overview
Before we discuss advanced custom layout implementation, let's first review how layouts, fields, workflows, and workspaces work together.
Every record in Aha! Roadmaps has a record layout — the arrangement of fields and tabs on each record that help you define your work give it strategic context. You can customize record layouts in your Aha! Roadmaps account to match your team's needs: adding custom fields to track important data, then arranging fields to highlight key information.

Most records in Aha! Roadmaps also have a workflow — the statuses the record goes through during its lifecycle. You can define workflows with custom statuses to map your team's ideal workflow in Aha! Roadmaps.

So to review: you add fields to layouts, then assign layouts to workflows. All of this happens at the account level of your Aha! Roadmaps settings, and you need to be an administrator with customizations permissions to adjust any of these settings. At the workspace and workspace line level, workspace owners can choose which layouts and workflows they want to use to each record type in their workspace. Workspaces can inherit their layout and workflow configuration from workspace lines, so you can establish your layouts and workflows once, and use them to drive a consistent orientation towards work across the teams in each workspace.
Organize fields into custom tabs
Many teams use custom fields to capture important details about the work that is not part of Aha! Roadmaps by default. You can add as many custom fields as you need and customize your record layouts to suit your needs. Custom tabs give you the flexibility to organize those fields into individual tabs — so they are grouped in a logical way. For example, you might group financial metrics related to budget, cost, and ROI, in a tab named Finance. This makes the details easier for the team to find and update.
Navigate to Settings ⚙️ Account Custom layouts. Select the record type you would like to customize. Then, click Add custom layout or hover over the layout that you wish to edit. Either option will open the Custom layout builder.
Using the Record view layout, drag the Add custom tab option from the left section into your layout. You will then be prompted to name your custom tab. This is the name that will be shown on the tab when you view a record in a drawer or details view. Now you can add new or existing custom fields to your custom tab. You can also move any standard field into the custom tab.
Be sure to adjust the position of the tab in both the drawer and details view. Custom tabs can be moved to any position relative to other tabs in your layout — including the More section and the right panel in the Details view.
Click Save layout to save or Cancel to cancel your changes.
Create alternate layouts for the same record type
Your work changes throughout its lifecycle — and a record might need different fields at different stages. Thanks to advanced custom layouts, you can create alternate record layouts that map these changes, then apply them to different workflow statuses. For example, before an initiative has been approved, it might use a record layout with an editable budget field, and after approval, the budget field might need to be read-only.
The first step is to create multiple custom layouts for the record type you want to adjust. But you do not have to start from scratch. Navigate to Settings ⚙️ Account Custom layouts, hover over the layout you want to create an alternate version of, and click More options Copy.
Think about the fields you want to add, remove, or mark read-only in each stages of your workflow, then Edit the copied layout. Be sure to give your alternate layout a distinct name so that you can select it later.
Map different layouts to workflow statuses
With your layouts created, it is time to apply them to the record's custom workflow. Navigate to Settings ⚙️ Account Statuses and workflows to get started. You will need to be an administrator with customizations permissions to adjust these settings.
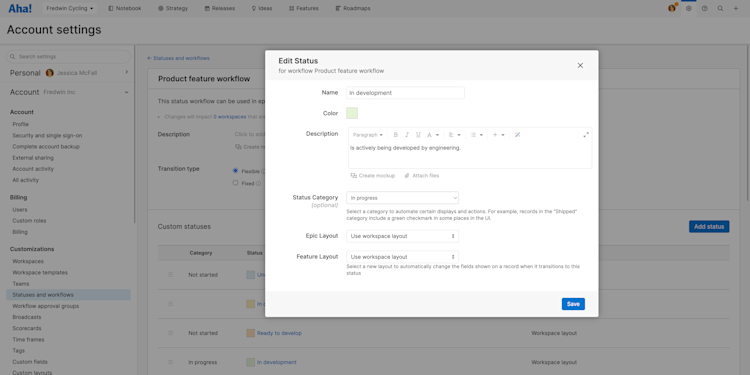
You can adjust the workflow you have selected to add and arrange statuses, status transitions, or workflow approval gates. After the workflow looks perfect, hover over a status and click Edit.
This will open the Edit status modal. At the bottom of the modal, select which layout the record should use when it changes to this status. You can change it to any custom layout that has been created in your account, so it is helpful if you have given your layouts unique names. Click Save to save your changes.
Congratulations! When a record reaches the point in the workflow you just edited, its layout will change.
If you want a record to use your new alternate layout for the rest of the workflow, you will need to select that alternate layout for each subsequent status in your workflow.
To save yourself some time, consider which layout the record will use for most of the workflow. Make that layout the default for the workflow, and change the statuses that need to reflect the less frequently used layout.
Use advanced custom layouts to align workflows
Workflows drive consistency across a workspace — or across all workspaces under a workspace line. Coupled with custom layouts, that means you can orient teams towards their work in the same way, requiring the same information on the same arrangement of fields across multiple workflow statuses. Even if every team under a workspace line has different work — different products to develop, different marketing expertise, different professional services to offer — you can use these settings to drive consistency and create opportunities for cross-functional alignment.
Workspace owners are the key to this alignment.
At the workspace line level, navigate to Settings ⚙️ Workspace Configure and select the Custom layouts for each record type that you want the child workspaces to adopt.
In each workspace under that line, navigate to Settings ⚙️ Workspace Configure and select the same Workflow for each record type. Then under Custom layouts, select Use layouts inherited from workspace line or select Inherited for individual record types.
Inherited custom layouts mean that you can change default record layouts once at the workspace line level and populate your changes across each individual workspace automatically. Consistent custom workflow selection means that each workspace will follow its work through the same statuses, transitions, and advanced custom layouts.
Best practices
Before you implement advanced custom layouts, there are a few things to keep in mind:
Since you will be applying multiple custom layouts to the same custom workflow, it is important to give your custom layouts unique names.
If you want a particular layout to persist through several statuses in a custom layout, you need to update the record layout on each status. To save yourself effort, think about which record layout will apply to most statuses within a workflow, and make that layout the workflow default.
Advanced custom layouts can include read-only fields — fields on a record that cannot be updated directly through its detail or drawer view. Read-only fields can still be updated through imports, integrations, or reports (in fact, often you want to be able to update them in one of these ways). So think of read-only fields as a way to keep your team from inadvertently updating a field, rather than a way to lock fields.
Want to include a custom table? Advanced custom layouts now support one-to-many custom table relationship fields. You can enable or disable a custom table tab on your record layout per workflow status.
If you get stuck, please reach out to our Customer Success team. Our team is made up entirely of product experts and responds fast.